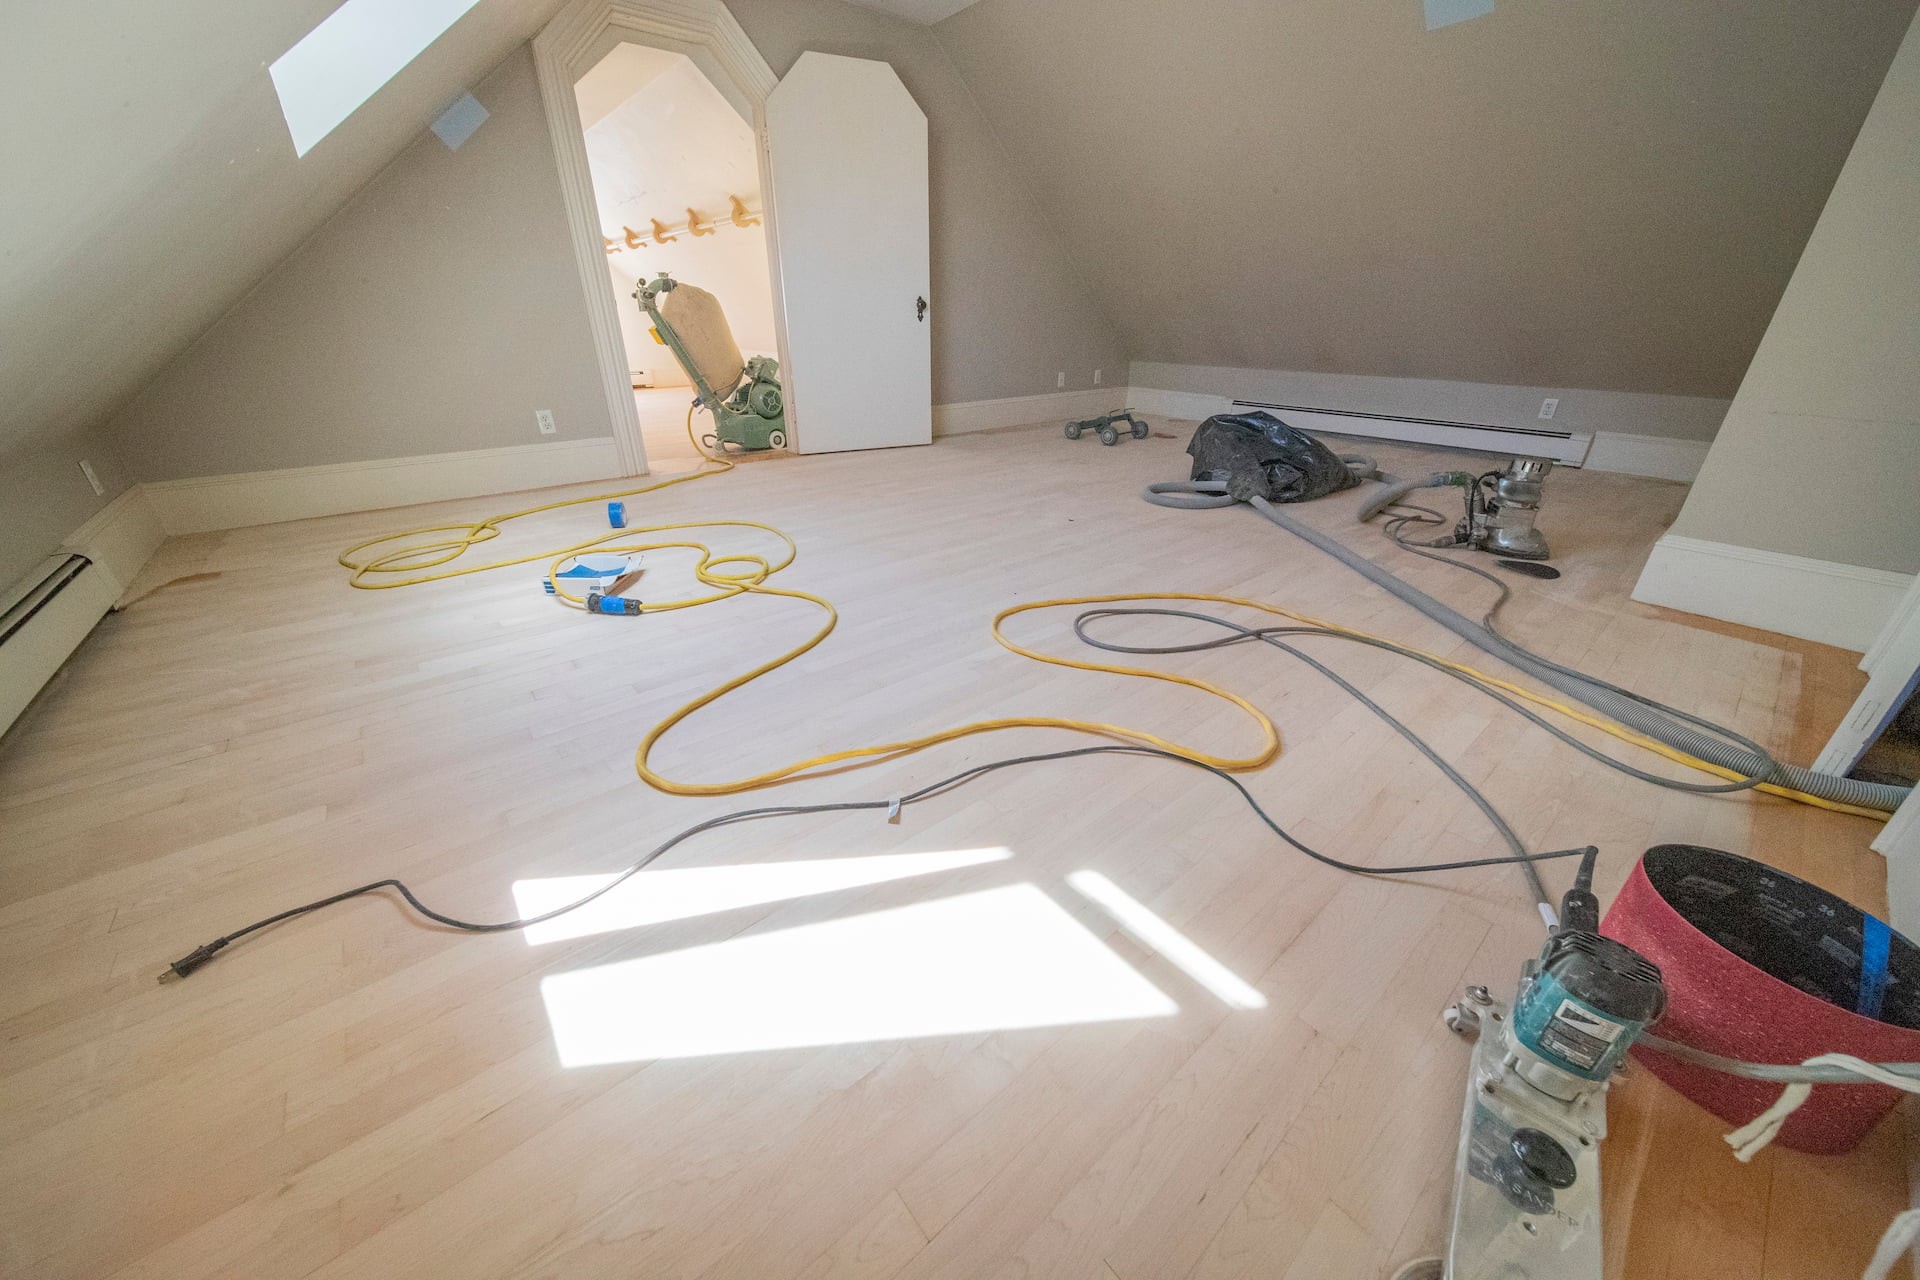

So, wood floor gaps? That's a common problem with hardwood floors. Or not even that - it's just natural. The temperature in your room is always changing. This is what leads to cracks and splits in your wooden floor. It not only causes discomfort but also aesthetic dissatisfaction!
At Weles, we've heard a lot of stories. But there's one that stands out. This winter we were contacted by a customer. He told us that the wood floor was starting to look like a puzzle..... And it wasn't funny. Not only did they look strange, but it was strange to even walk on such a floor.
Our aim? We will tell you not only how to fix wood floor gaps with your own hands, but also in which cases it is worth contacting professionals and how to avoid floor gaps in the future.
Scientific Explanation for Gaps in Wood Flooring
Causes
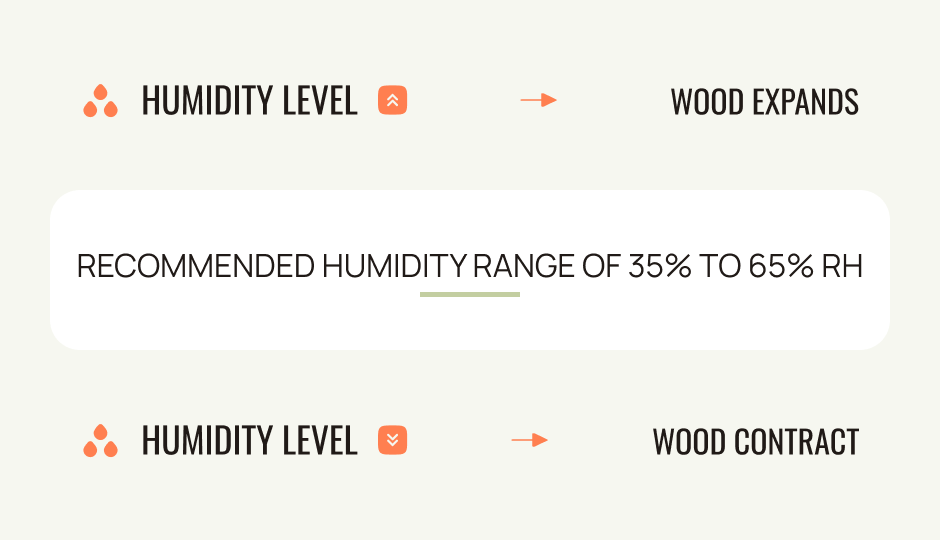
Gaps in wood flooring, unless they are caused by mechanical effects, appear naturally due to moisture and temperature changes. As noted in a scientific paper by Drerup, Erdem, and Anthony (2012), wood floors expand when humidity increases and contract when humidity decreases. It is in winter that the phenomenon manifests itself most. Because of heating, the humidity level decreases.
Engineered wood flooring, designed to be more stable than solid wood, can still exhibit uplift, bowing, and gapping if not manufactured or installed correctly or when exposed to environmental conditions outside the recommended humidity range of 35% to 65% RH.
Michael J. Drerup, PE, one of the study's authors, emphasizes:
«The flooring performs satisfactorily within the allowable humidity range, and that poor performance at lower relative humidity was attributable to construction layup of the flooring product, the method of installation, and the building environmental conditions»
Effects
Wooden floor gaps - not only spoil the appearance, they also cause dust and dirt to build up, which can lead to tripping and injury. According to experts, these gaps can also weaken the overall stability of the floor, especially when combined with other issues like sagging or lifting boards.
Assessing Your Wood Floor Gaps
All you need is a ruler or a measuring tape. Measure the width of the gaps in your wood floors. And record these measurements by writing them down. Then categorize them based on their size:
-
Small Gaps: Less than 1/16 inch;
-
Medium Gaps: Between 1/16 inch and 1/4 inch;
-
Large Gaps: Greater than 1/4 inch.
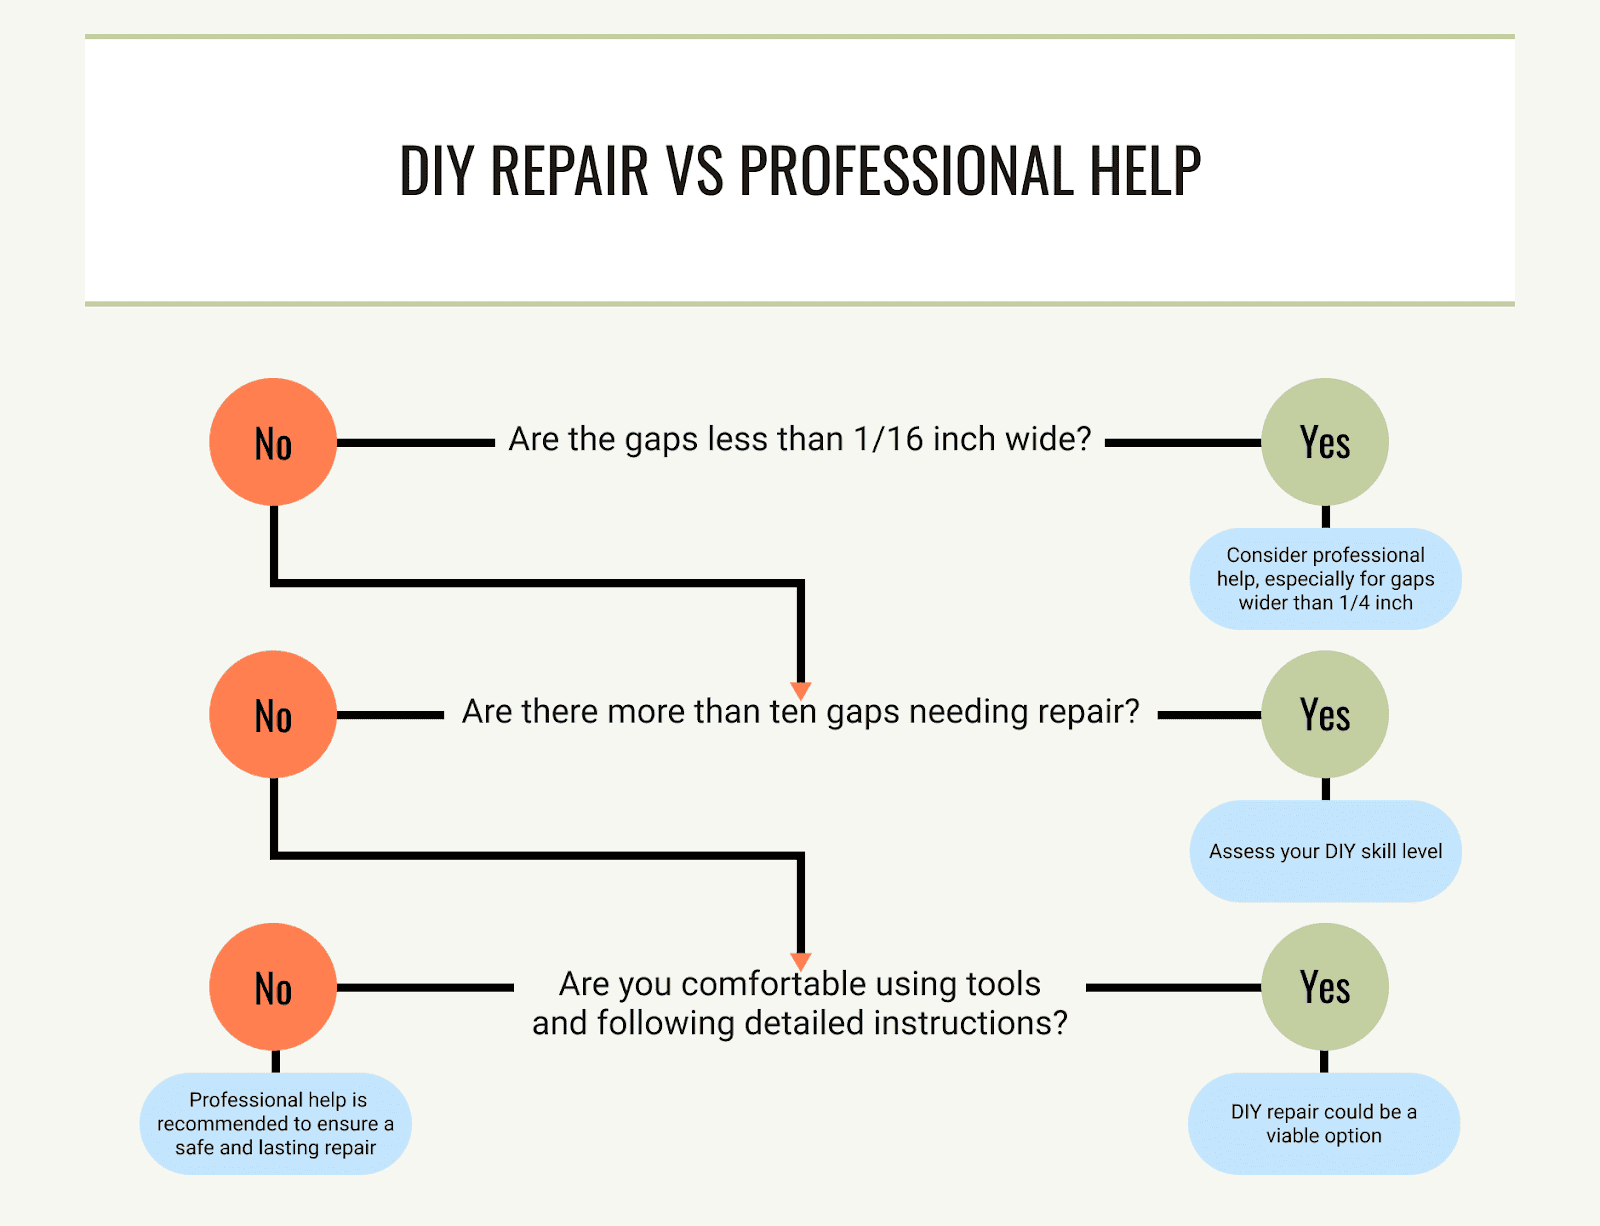
Decision Flowchart: DIY Repair vs. Professional Help
Now, you need to figure out if you can handle those wood floor gaps yourself or if you need some help from the pros. We've created this flowchart to help you make your decision:
DIY Methods for Fixing Wood Floor Gaps
Method 1: Wood Filler for Small to Medium Gaps
This method is great for small to medium wood floor gaps!
First things first, you need to decide to use your own filler or buy it. Commercial wood fillers are convenient, but they come in a limited range of colors. When you create your own, you use sawdust from your actual floor, ensuring the filler blends seamlessly with the existing wood grain and color.
Creating Your Own Wood Filler (Optional):
Materials Needed:
-
Fine sawdust from your wood flooring;
-
Wood glue (PVA glue is commonly used for its strength and flexibility);
-
Mixing tool (e.g., a small spatula or a disposable stick);
-
Mixing container.
Steps:
-
Collect Sawdust:
-
Sand a piece of spare flooring or collect the dust from recent floor work. You need enough to fill the gap plus a little extra for mixing. Aim for about a tablespoon of sawdust for small repair jobs as a starting point.
-
Mix Sawdust and Glue:
-
Start with a 2:1 ratio of sawdust to glue, which means for every 2 parts of sawdust, you use 1 part of wood glue. This ratio isn't carved in stone; it represents a starting point.
-
Add sawdust to your mixing container and then wood glue on top.
-
Mix the sawdust with the glue, using your mixing tool until it comes out perfect. You are targeting a consistency of putty—moldable without being too wet or sticky. It should hold together without dripping and be easily molded to your fingers.
-
Adjust Consistency:
-
If it's too dry—crumbly, hard to shape—add glue in small increments until you achieve the right consistency.
-
If it's too wet—when it's sticky and hard to handle—add some more sawdust and try mixing again. Adjust very slowly until satisfied.
-
Application:
-
Once mixed, use the filler immediately to fill in gaps in your floor, following the instructions of the application as described in Method 1.
💡 Tip:

For best results, test the filler on a small, inconspicuous area of your floor to ensure the color and texture match before filling more visible gaps.
📝 Note:

Homemade filler works best for small to medium gaps and areas where a precise color match is critical.
⚠️ Pitfall to Avoid:

Mixing too large a batch at once. The filler begins to dry out after mixing, making it harder to work with. Mix small batches to ensure the filler is fresh and pliable when you use it.
Application of Wood Filler
Materials Needed:
-
Wood filler (store-bought or homemade)
-
Putty knife
-
Fine-grit sandpaper
-
Wood finish (to match your floor)
-
Scotch tape
Steps:
-
Prepare the Gap:
-
Clean: Remember to clean the wood floor gap and all around it really well with a brush and a vacuum. Dust, dirt, or anything else can cause problems with the filler holding things together.
-
Apply the Filler:
-
Fill: Using a putty knife, grab a little bit of wood filler to fill the gap. Then, press it into the gap and smoosh it down. If there's a bigger gap, it's better to do it bit by bit, carefully filling in the space.
-
Smooth: Then, use a flat edge of the putty knife to level the filled area, getting rid of any excess filler.
-
Let It Dry:
-
Allow the putty to dry. Refer to the instructions for time. On average it's 3-4 hours or even a day.
-
Sand and Finish:
-
Once the filler is completely dry, gently sand the area with fine-grit sandpaper until it's flush with the floor. Be careful to sand only the filled area to avoid scuffing the surrounding finish.
-
Apply a matching wood finish to the sanded filler. This may involve staining, varnishing, or applying a sealant, depending on your floor's original finish.
📝 Note:

Not every filler is suitable. Choose a filler that matches the color of your wood.
⚠️ Pitfall to Avoid:

Avoid overfilling the gap. Applying too much filler can lead to a bumpy finish once it dries. It's easier to add more filler if needed than to remove excess once it's dried and sanded.
Method 2: Using Wood Strips for Larger Gaps
For large gaps, putty will prove to be an inappropriate solution. In this case, custom-cut wooden sticks or silvers should help.
Materials Needed:
-
Matching wood (same species as your flooring);
-
Wood glue;
-
Rubber mallet;
-
Fine-grit sandpaper;
-
Wood finish (to match your floor).
Steps:
-
Measure and Prepare the Wood Strip:
-
Measure: Accurately measure the length and width of the gap. Even a small mismatch in size will make the wood strip unsuitable!
- Cut: Cut a strip of matching wood and then make sure the cat is smooth and straight so it fits snugly. If needed, sand the edges slightly for a smoother insertion.
-
Apply Adhesive:
-
Glue: Apply wood glue. However, apply the glue to the sides of the wooden strip rather than the bottom to ensure a more natural fit.
-
Insert the Wood Strip:
-
Fit: Carefully position the strip above the gap, ensuring it's aligned correctly.
- Tap: Using a rubber mallet, tap the strip into place. The wood should not be damaged and the strip should gently tap into place with little effort.
-
Finishing Touches:
-
Dry: Allow sufficient time for the glue to dry.
-
Sand: Once the glue is dry, sand any raised areas of the strip until it’s flush with the surrounding floor. Proceed gently to avoid damaging the strip or the adjacent flooring.
- Finish: Apply a matching wood finish to the sanded area. This might involve staining and sealing to perfectly match the existing floor.
📝 Note:

Always use wood of the same species as your floor for any repairs. In this manner, its grain, color, and texture will match the existing flooring perfectly, making it hardly noticeable.
⚠️ Pitfall to Avoid:

Avoid applying too much glue. If you do, it's likely to squeeze out from the edges when you use the strip and form a messy surface that's difficult to wipe clean, and it will raise the finish. If some do squeeze out, convert quickly before it dries.
Method 3: Re-Tensioning with a Floor Gap Fixer (For Floating Floors)
Closing gaps in floating floors sometimes requires a different approach. The Floor Gap Fixer tool, designed specifically for this purpose, helps re-tension the flooring without the need for adhesives or additional materials.
🚨 The Floor Gap Fixer tool won't be effective in closing gaps caused by structural issues or in floors where planks are glued or nailed down, as it's designed specifically for floating floor systems; additionally, while it can shift planks to close one gap, it may inadvertently open another on the opposite side due to its mechanism of simply moving the boards horizontally.
Materials Needed:
-
Floor Gap Fixer tool (or a similar suction-based device);
-
Rubber mallet.
Steps:
-
Prepare the Area:
-
Clean the Floor: Ensure the plank surface is free from dust and debris. A clean surface allows the suction cup of the tool to adhere securely, providing the necessary grip to move the planks.
-
Position the Gap Fixer:
-
Attach: Firmly press the suction cup of the Floor Gap Fixer against the plank closest to the gap. Check that it's securely attached to prevent it from slipping during the next step.
-
Tap to Close the Gap:
-
Gentle Taps: With the tool in place, use a rubber mallet to gently tap the end of the Gap Fixer. The goal is to shift the plank horizontally, closing the gap. Proceed with gentle taps to gradually move the plank until the gap is closed.
-
Repeat as Necessary:
-
Adjust Position: If the gap doesn’t close after the first few taps, or if there are multiple gaps along the length of the plank, reposition the Gap Fixer and repeat the tapping process. It might take several adjustments to completely close larger gaps.
📝 Note:

For the suction cup to adhere properly, not only does the floor need to be clean, but the suction cup itself should also be free from dust and dirt. Before each use, give it a quick wipe to ensure optimal performance.
⚠️ Pitfall to Avoid:

While it might be tempting to use force, especially with stubborn gaps, applying too much force can damage the planks. Start with gentle taps and increase force gradually, only as needed. This method requires patience to avoid causing harm to your flooring.
When to Call the Professionals
DIY methods for fixing wood floor gaps is definitely an effective and budget-friendly solution. However, there are certain situations where the expertise of professionals is essential. We at Weles, a company that specializes in wood floor installation, understand which situations require the work of experts.
Criteria for Seeking Professional Help:
-
Large or Numerous Gaps: If your floor has too many large and complex gaps, professionals can deal with them more efficiently and quickly or offer another more comprehensive solution;
-
Structural Concerns: If the gaps are the result of a shifting foundation or sub-floor, the solution goes beyond DIY methods. A specialist's view is needed here;
- Floors with Historical Value: If the floor has historical significance, it will require a special professional approach to preserve its integrity and appearance;
- Persistent Moisture Issues: If the problems are related to persistent moisture, DIY methods alone are not enough. Professionals will offer solutions to eliminate gaps while alleviating the effects of moisture;
- Complex Installations: Complex floors with patterns, inlays or exotic woods require finesse when working. Here you need more experience in the field.
Preventative Measure
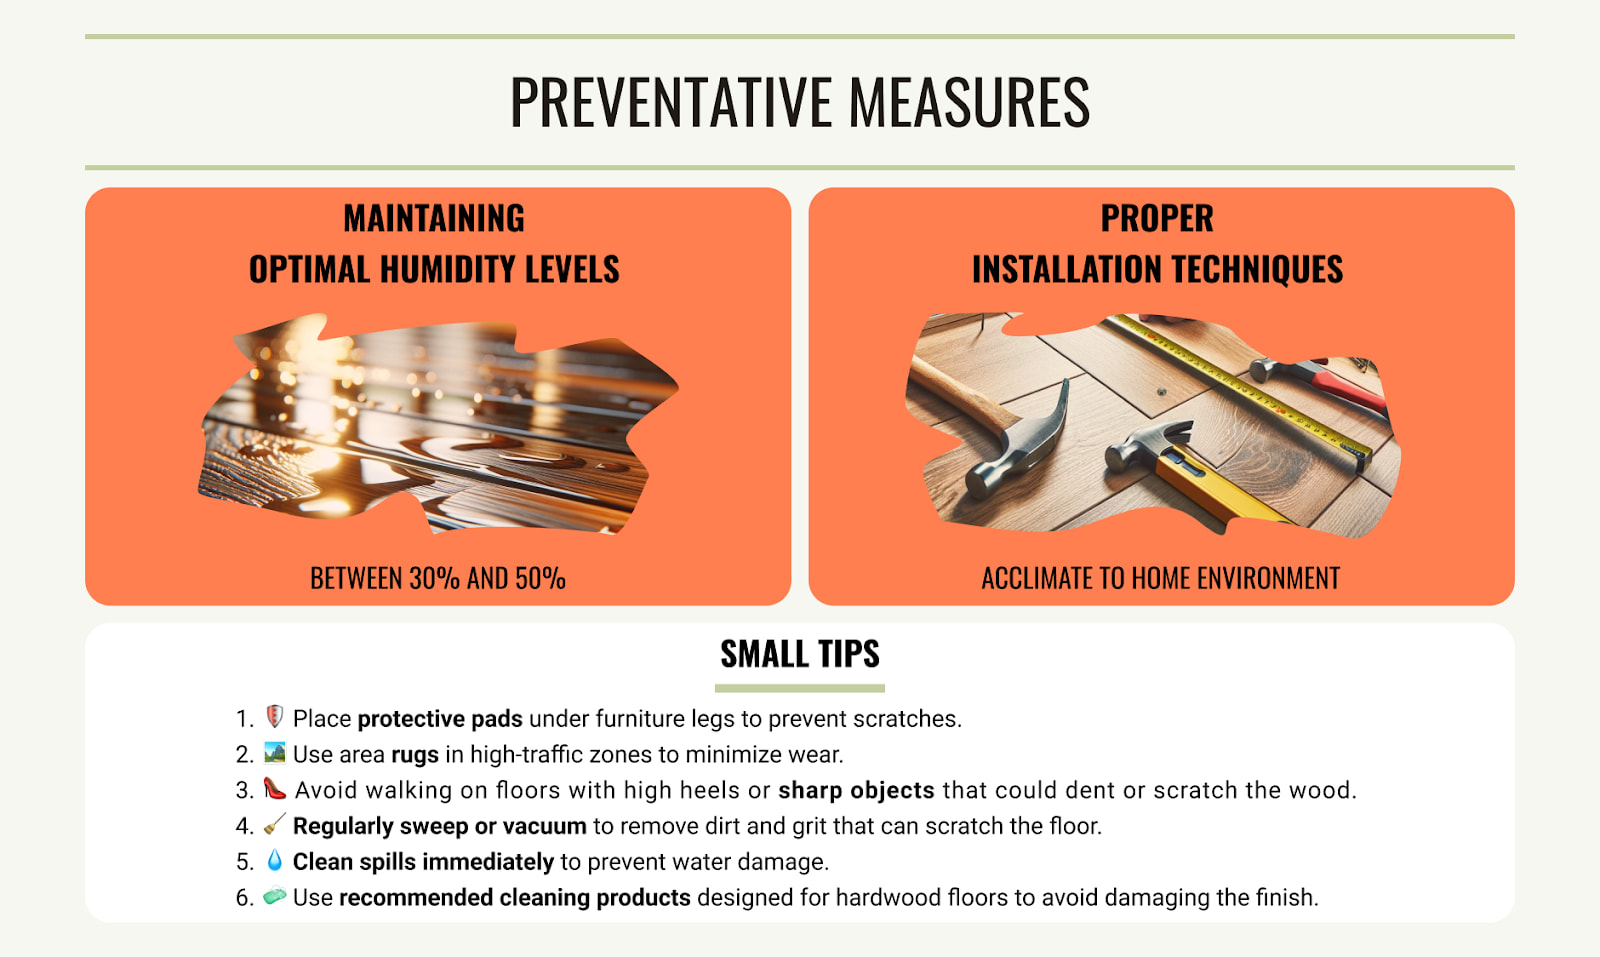
Let's assume we've dealt with the gaps. But what can we do to avoid them in the future? Optimal moisture level and proper installation of wooden floors is the solution to all problems.
Maintaining Optimal Humidity Levels
Optimal indoor humidity levels between 30% and 50%, a range supported by numerous studies and industry guidelines, including those from the National Wood Flooring Association (NWFA). The scientific paper mentioned at the beginning of the article gives slightly different values. For more precise numbers, it is better to contact the manufacturer.
Use humidifiers during dry months and dehumidifiers or air conditioners during humid months to keep humidity levels within this optimal range.
Proper Installation Techniques
Make sure you get the floor installed by professional wood flooring experts. The key to a successful hardwood floor installation is to let the wood acclimate to the home's environment before putting it in place, and to leave a little space around the edges of the room so the wood can expand and contract with changes in humidity.
Small Tips for Everyday Use
-
Place protective pads under furniture legs to prevent scratches;
-
Use area rugs in high-traffic zones to minimize wear;
- Avoid walking on floors with high heels or sharp objects that could dent or scratch the wood;
- Regularly sweep or vacuum to remove dirt and grit that can scratch the floor;
- Clean spills immediately to prevent water damage;
- Use recommended cleaning products designed for hardwood floors to avoid damaging the finish.
⚠️ Maintaining Warranties:

To preserve your guarantee, you must take care of and maintain your floor in accordance with the manufacturer's recommendations. This entails employing the proper cleaning techniques and staying away from anything that might harm your floor, such as particular cleaning agents or chemicals.
Conclusion
Keeping your hardwood flooring in good shape is simple. Just be sure to fill any gaps straight away, stick to a regular cleaning routine, and don't be nervous to call a professional if you have any more significant issues. This ensures that your flooring remain in good condition for many years.
Questions or Feedback?
If you want us to review your floor case or clarify anything in this guide, send us a note.
Email: weles.usa@gmail.com